This page will detail the steps to completing the setup for IceWarp.
Please email support@armresearch.com with any questions.
General Objectives
Completing the installer will leave you with a technically correct Sniffer installation, but unless IceWarp's filter features are properly turned on, Sniffer won't run.
The general objective of this document is to explain the three ways Sniffer can be integrated with IceWarp, and pointing out the needed settings.
Architectural Overview
In Step 1 of the SNF_CS_Installer document, you may select IceWarp as your platform. The installer will then present you with the following three methods for Sniffer to integrate with IceWarp.
- As a Spam-Score contributor. Sniffer likes to play well with other filters. This is the way to weight it against other tests.
- As an independant decision maker for whether a message is spam. (i.e. Pass/Fail) Sniffer likes to be the boss too. If Sniffer says it's spam, it's gone.
- In an "Anti-Virus" priority scan position. Sniffer gets called first, before anything else. This is fastest way to cull out messages quickly and bring aid to an overloaded IceWarp mailserver.
TIME SAVER: If you already had a fully functioning installation of IceWarp prior to installing Sniffer and your anti-spam features were running, then there is no need to continue through this document for installing in either of the first two modes. All settings would have been properly configured prior to the install.
This is not true if you are installing in "Anti-Virus" scan position. "AV" mode will still require you to manually check some settings. You will also need to review this document if you just installed IceWarp.
NOTE: Sniffer is not an Anti-Virus tool. In this article, Sniffer can be deployed with IceWarp in the AV position giving it higher scan priority to improve performance.
IceWarp (MerakMail) Settings Guide
If you already have Message Sniffer installed, then you can walk though the manual explanation of IceWarp integration rather quickly. The installer handles the XML integration, however, there are settings for proper performance which can ONLY be done through the IceWarp Administration screens.
IceWarp supports three different means of tying in external filters. Content Filters, which can execute programs and take actions depending on a non-zero result; the Anti-Virus External Filter, which supports the tie-in of any executable filter; and the Mail Service External Filter that supports the tie-in of a .dll. (We have received the specs for these, and are considering development of a .dll if the community feels there is sufficient need.)
This tutorial addresses both the XML ContentFilter integration found under MailService - Filters - ContentFilter and the Anti-Virus External Filter. These two instances seem to provide all the useful variants of tying into the processing stream for Merak's Mail Server.
In choosing which vector to use, you should consider the following points:
(Click on the heading to jump to the method of choice.)
- Content Filter (A): You want to use Message Sniffer in conjunction with other tests and relocate spam to the user's SPAM folder, but you want to contribute to IceWarp's Spam Score which may or may not bump the score over the required value to be categorized as spam.
- Content Filter (B): You want to use Message Sniffer to relocate spam in the user's folder, but you want Sniffer to have the final decision, not IceWarp.
- Anti-Virus Impersonation: You want to optimize IceWarp for speed, but you still want to run SpamAssassin as a backstop. Message Sniffer will have the first and authoritative decision, but if Sniffer lets it pass then all other filters will run. Other filters will NOT run if Sniffer kills the message (CPU optimization).
ANTI-VIRUS INSTALL VECTOR
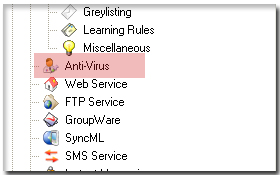
1. In the left options pane, down at the bottom, click Anti-Virus (Figure 1).
Figure 1
The Good News: If you install Sniffer in Anti-Virus scan position, it is the first test that happens. You are accepting that Sniffer will make the decision on whether the message is spam. A non-zero response from Sniffer in this call-back will result in the immediate deletion of the message. This is a good choice for server optimization. If you have a high load and you want to improve server performance quickly, this method may be the most valuable to you. In order to see this, it is important to understand the execution order of tests and filters in IceWarp.
The Bad News: According to Merak Support, if you have a filter type enabled it WILL run, regardless of the decisions before it, after it, or its spam score throughout the process. That means there is no early exit from the process based on a huge score. The sole exception is the Custom Content Filters. Custom Content Filters have the ability to abort any further Custom Content Filters from executing. However, since these filters run LAST, it is of limited value for optimization. (They run after A/V, IP, B/W, Beysian, SpamAssassin, Rules - then FINALLY Custom Content Filters.)
If SpamAssassin is enabled, it WILL run (this is not necessarily desirable considering the ponderous CPU load of SA). Running Sniffer in AV Scan position will delete detected spam before all the other tests spend any server CPU cycles on it. Only clean messages, or missed spam, will be passed into the normal IceWarp test sequence.
Critical Steps:
2. Select Anti-Virus on the left pane and you will be presented with the General Tab (Figure 2). (The Active checkbox is for the Merak's built in AV scanner (Avast) and not relevant to this tutorial.)
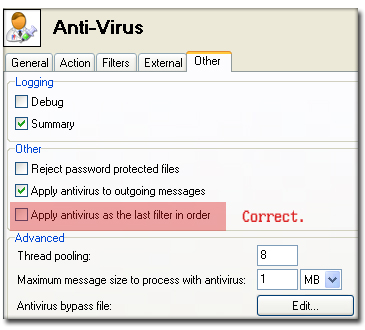
Select the "Other" tab (Figure 3).
Figure 2
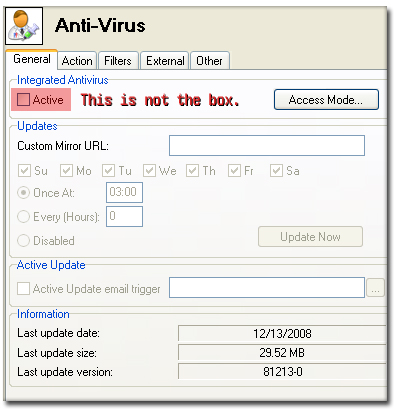
Note: IceWarp has the option to run its AntiVirus first OR last. If you install Sniffer in Anti-Virus scan position, you need to ensure that the run-last setting is un-checked (Figure 2). If not, then the AV will run after the Custom Content Filters, and you have lost the only reason for plugging in, in this fashion. The highlighted box should NOT be checked. If it is flagged to run last, uncheck the box.
Figure 3
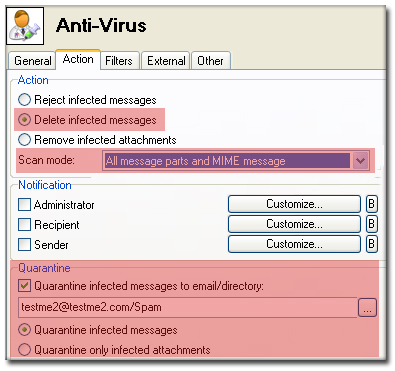
3. Next click the "Action" tab. This panel determines the actions taken when a message is determined to be a "virus" (Figure 4).
4. Check Delete Infected Messages and set the drop down so that it scans ALL MESSAGE PARTS. If you wish to move and have a copy of everything, you can set it in the quarantine here (use at own risk - we recommend deletion.)
Figure 4
5. Lastly, go to the "External" tab (Figure 5). This image is shown with the ClamAID's install of ClamAV also tied into IceWarp. (Not Included in this install.) However, if you see ClamDScan.exe present, ensure that the SNFClient.exe is above ClamDScan.exe in the list. If it isn't, select SNFClient.exe and move it to run first in the list. Be sure that the "Enable external antivirus" is checked.
Figure 5
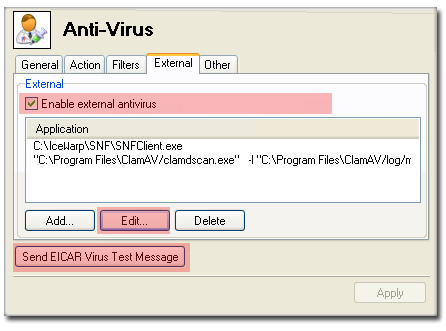
If you want to see the guts of the tie-in you can select the filter and press EDIT (as seen in Figure 5), Figure 6 will open.
Figure 6
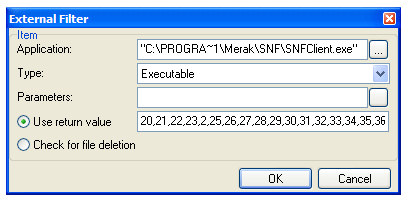
Sniffer requires a valid path to its client executable in quotations to protect space containing paths. You must have the Type drop down set to EXECUTABLE.
You must also have Use Return Value selected and all numbers from 20 through 70 in a comma separated list. DO NOT put zero (clean) in this list. IceWarp will delete the message after the filter returns any of these return values. The Check for File Deletion option is only used if a filter takes control and deletes the message itself.
Parameters can be used to pass instructions to other AV programs. Sniffer doesn't require any command line options at this time.
That concludes installing Sniffer in AV impersonation mode.
CONTENT FILTER INSTALL VECTOR
This section will detail how to confirm proper installation of the content filter, configure the system to properly place spam in the user's spam folder, and choose between the two recommended configurations of content filters.
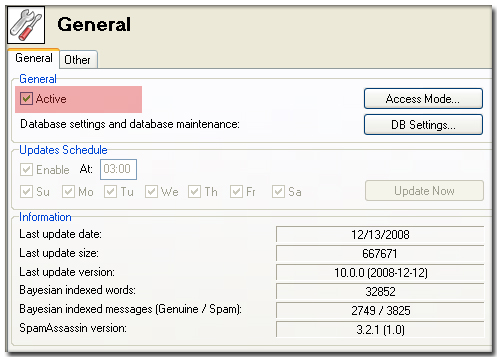
1. Go to ANTI-SPAM-GENERAL in the left control pane (Figure 7). The right options pane should present the General tab (Figure 8).
Critical Step: Set the General-Anti-Spam ACTIVE box in the General tab to CHECKED.
It is important that you have the General Anti-Spam ACTIVE box, checked. If this is not checked, the spam-score comparison doesn't function, the actions taken when a message is marked as spam won't occur, and the ~spam folder is not automatically generated in each user's folder structure upon creation of a new user.
Figure 7
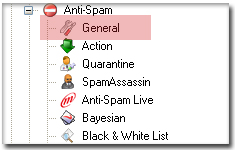
Figure 8
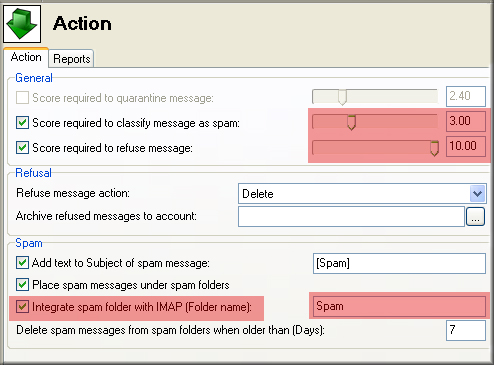
2. Navigate to ANTI-SPAM-ACTION in the left control pane (Figure 9). The right options pane should present the Action tab (Figure 10).
This is where you determine the score threshold for marking/deleting/removing/rejecting a message when it is classified. This is less important if you are having Sniffer operate in an authoritative role, but it is still important for the rest of the tests to work in conjunction with each other. If you have MANY external tests you are organizing, then this value becomes important because Sniffer may contribute 5 to the score, and you may only want one other score to bump it over the threshold.
Critical Step: You MUST check Integrate Spam Folder with IMAP SPAM if you want it to create the user's spam folder and move flagged messages into the ~spam folder for user review of false positives.
Figure 9
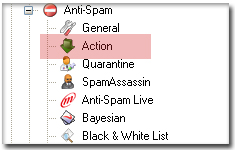
Figure 10
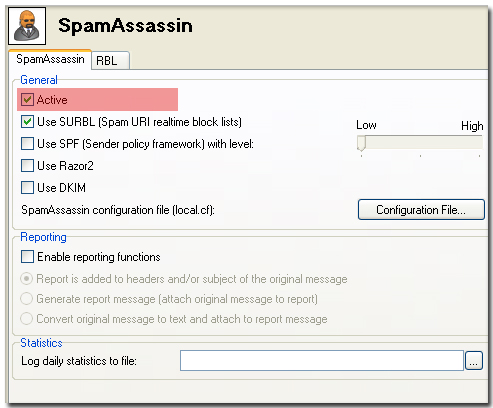
3. Going to MailService -> SPAM ASSASSIN in the left control pane (Figure 11) allows you to turn SA off (Figure 12). If it is on, Spam Assassin WILL run for every message. Sniffer installed as a Content Filter runs AFTER SpamAssassin. Only turn off Spam Assassin if you are really hurting for optimization. If turning Spam Assassin off improves your performance, then you might consider installing Sniffer in an Anti-Virus position, and leaving SA on to run against anything that gets through Sniffer.
NOTE: If users were created with the IMAP spam feature turned off, then no user spam folders will have been created. Don't panic: Turning the "Integrate spam folder with IMAP" feature on will retroactively build the folders in all users.
Figure 11
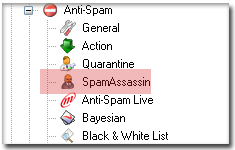
Figure 12
INSTALLATION IS DONE AT THIS POINT. IF YOU USED THE INSTALLER THEN THIS IS ALL THAT NEEDS TO BE CONFIGURED. You may continue if you are performing a manual install or are just interested in the technical details.
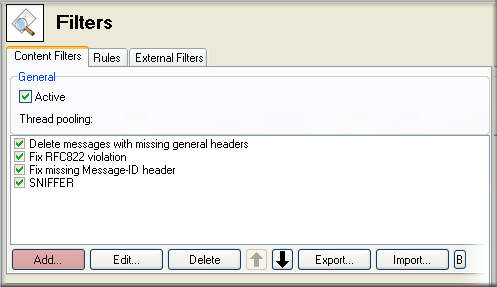
4. Navigate to MailService -> Filters -> ContentFilter in the left control pane. After you click on Filters, you will be presented with the Filter Screen (Figure 13). Please remember that this is a "Content Filter" not an "External Filter". Select Add.
Figure 13
5. Next, you will be presented with the screen to create the filter (Figure 14). If you've downloaded our XML template, you may chose to Import the filter and add it to the list (by clicking "Import", as seen in Figure 13). If not, the following paragraphs describe Adding (by clicking "Add", as seen in Figure 13) the filter manually.
Figure 14

6. In the create filter screen (Figure 14), only two Conditions are recommended to get started: the local/remote conditional, and the necessary Condition-is-Execution-of-Application.
You will see your filter being built in the description box. Click on "application" and enter the path to your SNFClient.exe. This will trigger the call of SNFClient.exe every time a message makes it through the previous filters.
7. Next, select your [Actions]. If you want to insert a message header, you can do that here. (Alternatively, Sniffer can inject its own headers if you customize the settings in Sniffer's snf_engine.xml file.) You may also alter the score for further processing. We recommend stripping the attachments if Sniffer returns non-zero. If Sniffer returns zero (clean) then all these actions are NOT taken, and the message moves to its original target.
Content Filter Differences
The difference between styles of Content Filter is whether or not you set the depicted Action "Accept/Reject/Delete/Spam/Quarantine" to take the action "Mark Message as SPAM" and if you abort the remaining filters. (Click the Action "Spam" to see the settings options.)
If you set the option as described "Mark Message As Spam", once a message is marked, it will be delivered to the ~spam folder of the User in question, after all other Content Filters are completed.
If you elect to have Sniffer "Mark-Message-As-Spam" plus either "Move" or "Delete" and/or "Abort" all other Content Filters, then Sniffer is acting in an authoritative mode.
If you have the filter built to only "Add To Spam Score", then it is relying on IceWarp's evaluation engine (Fig. 10) to make the Spam/Not-Spam decision based on the threshold and the remaining contributions from the other tests, thus the Sniffer install is operating in a contributing role.
Undesired Behavior
If all the settings are not correct, then you may observe the following undesired behaviors:
- The ~spam folder may exist, or it may not. (Incorrect IMAP setting.)
- Spam may or may not be put in the ~spam folder, and some folders may just disappear entirely. (Incorrect ACTION Settings in the filter.)
- Sometimes the mail is delivered to the INBOX marked as spam. Sometimes it is not delivered at all (deleted). (Incorrect IMAP setting for spam folder. Action settings probably ok.)
That concludes the Content Filter Installation of Sniffer for IceWarp's (MerakMail) Server.
Thanks and Good Luck.
Technical Summary
Requires Basic Sniffer Install:
In addition to installing Sniffer, the Installer will have done one of the following:Added a Content Filter:
Added a AV Scan call:
|