Be sure to double check your settings after using the Installer!
Alligate has several internal domain settings which may cause Message Sniffer not to receive messages. These settings cannot be set by the Installer. This tutorial walks you through double checking these settings in the Alligate control panel.
Enabling Alligate to run external filters requires two interface programs. Alligate's AGFILTSVC.exe to handle thread control and message throttling and Message Sniffer's SNF4Alligate.exe to enable customizing the response from Message Sniffer. Use the Installer to handle the placement and initial install of SNF4Alligate. SNF4Alligate sits at the Alligate root folder, and is configured further in this tutorial in the SNF4Alligate.xml file.
How Do I Get Started?
- Sign up for a 30-day FREE Trial. This will give you an authentication and license ID to download a production ready rulebase and updates FREE for 30 days. You will need the license and authentication in order to setup your SNF software. Our system will send you rulebase download instructions when your rulebase is ready, but the Installer will handle setting that up for you.
- Download the SNF Client/Server Win* SNF Client/Server Win* Installer (from Downloads index page).
- Review the Installer tutorial, and have your trial SNF license ready.
- Run the Installer.
- When you have completed the Installer, you will have installed Message Sniffer in a folder of your choice, pulled down a rulebase, and setup SNFServer as a service using XYNTService.exe. It will have installed SNF4Alligate.exe, as well as run Alligate's installer of AGFiltSvc.exe.
- Complete the following steps 1,2,3 & 4 of "Integrating Message Sniffer with Alligate" (below). System should be installed properly. If system is not working as expected, walk through remaining steps of tutorial to debug.
- Review the documentation on configuring the snf_engine.xml file for your specific needs (Header Injection, Rulebase Downloads, GBUdb). The default gateway settings are to have Sniffer tag all messages, and pass everything through to the delivery spool. If you want to quarrantine, or drop messages at the gateway, use the SNF4Alligate.xml file to customize the delivery response based on what results Message Sniffer returns from its scan.
Integrating Message Sniffer with Alligate
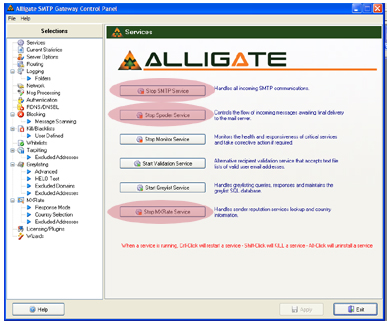
1. Open the Alligate Control Panel. Stop the three services shown in Figure 1. Top down in order: SMTP, SPOOL, and then MXRate Service.
Figure 1
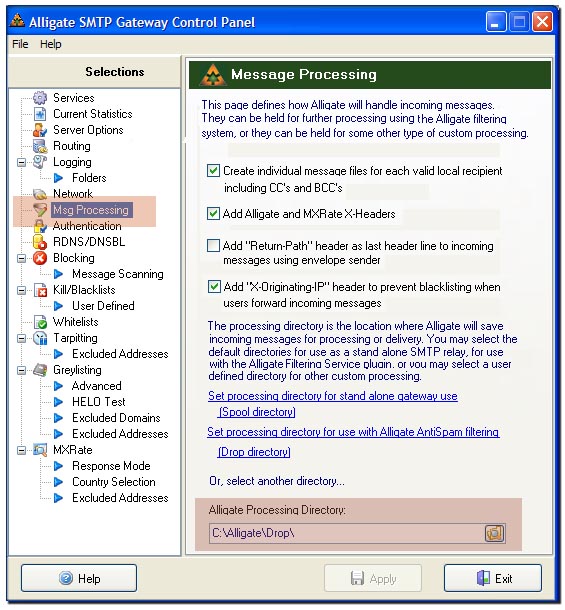
2. Select Message Processing on the left (Figure 2). At the bottom of the screen on the right side, click Set Processing Directory for use with Alligate Anti-Spam filtering. Or you can manually type in the [AlligateRootDir]\Drop\ (Insert your own root directory. Example: C:\Alligate\Drop\). This causes Alligate to put all the messages into this folder for pre-processing.
Figure 2
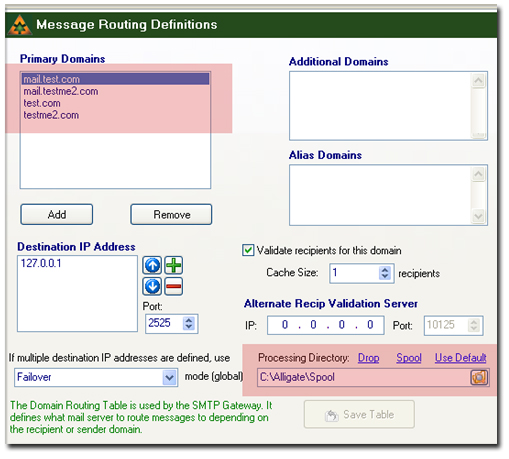
3. Navigate to Routing Tables (Figure 3). This page holds customized domain delivery settings. This is where a highly customized Alligate installation might override the Installer's default settings. Alligate's Routing Table options will override the global default process directory settings if they are customized. These need to be manually pointed to \Drop\ if they are different.
Figure 3
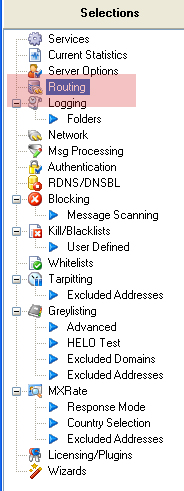
Figure 4
Congratulations! If you used the Installer, you're
done. You can test your installation by sending yourself a message. If you
receive the message and confirm that Message Sniffer has tagged the x-header,
then the install is a success.
The rest of this article explains how to confirm each step that the Installer completed behind the scenes.
Review this if your installation isn't working as expected.
We recommend that you use our Installer,
especially to ensure these remaining steps are handled properly. They require
some work in the registry. Here are the remaining steps:
5. Confirm Alligate's Filter Service is running.
The Alligate filter service (AGFILTSvc.exe) is located in the root Alligate folder. AGFiltSvc is NOT activated when you install Alligate. Our Installer handles installing and starting the service.
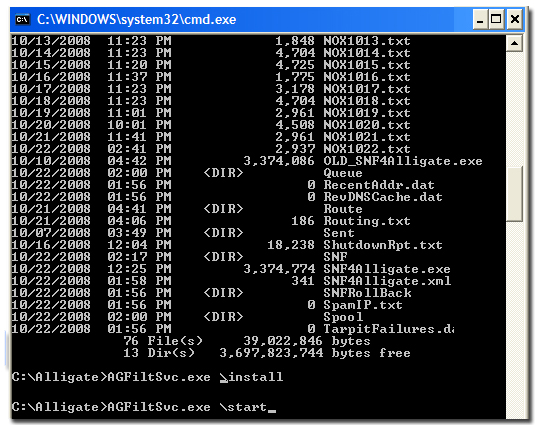
Open a cmd window and type "NET START". It will list all running services. AGFiltSvc.exe should show up as "Alligate Filter Service". If you are starting it manually, navigate to your Alligate root folder. Install and start the Alligate Filter Service with the appropriate commands (Figure 5).
AGFILTSVC.EXE /install Installs the service into the Windows Service Control
Manager (SCM).
AGFILTSVC.EXE /start Starts the service. Will also call install if not installed
into the SCM.
AGFILTSVC.EXE /stop Stops the service.
AGFILTSVC.EXE /uninstall Uninstalls the service and removes from the SCM.
Figure 5
6. Confirm that Sniffer's Service is running.
When you listed the running services in Step 5, you should also see "SNFService" present in the list. Again, this would be handled by the Installer. See Installer tutorial here.
7. (Optional) Confirm SNF4Alligate Settings.
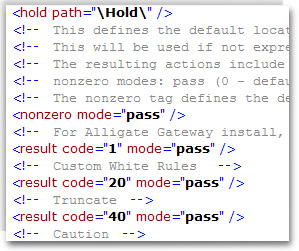
This is an example SNF4Alligate.xml file which is placed in the root Alligate directory (Figure 6). You can configure this file to have Message Sniffer delete messages (drop), or hold them (hold) for any return codes that are possible (see comments in SNF4Alligate.xml file).
Use-tests showed that most users employing a gateway would tend to key off of Sniffer's headers downstream. The Installer defaults Message Sniffer's settings for detailed message header injection and sets SNF4Alligate to PASS for a gateway installation (it does NOT drop messages, by default).
Figure 6
8. Confirm the proper placement of SNF4Alligate.exe and SNF4Alligate.xml.
These files need to be in the root Alligate directory (placed there by the Installer). The files need to be at Alligate's root because AGFILTSvc.exe defines its external call from its FilterExe setting, which will not allow paths, only the executable name. Alligate presumes the filter-executable is local. If you are unsure of this, you may look up Alligate's full path in the registry under SOFTWARE\SolidOak\Alligate\Settings InstallDir. You may have Message Sniffer installed anywhere provided that SNF4Alligate.exe is in Alligate's root folder.
Figure 7
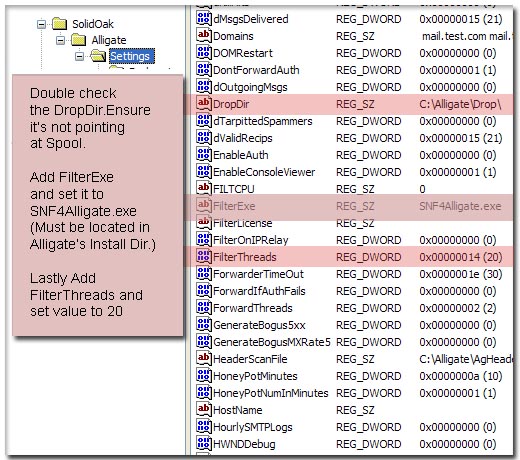
9. Confirm Alligate Registry Entries.
While you are in your registry, confirm that the Installer has added the FilterExe key and FilterThreads key to the Settings folder of Alligate (Figure 7). FilterExe's value is 'SNF4Alligate.exe' and FilterThreads is the number of running scans you want to permit. 20 threads for filter processing is a good default setting but we've seen viable systems at 40 and even 60.
10. Lastly, if you have another filter you want to hand off to if Message Sniffer decides that the message is clean, you may enter that in the delivery program setting of the snf4Alligate.xml file. Enter the full path to the filter you would like SNF4Alligate to attempt to hand off to. Yes, we did say 'attempt'. This feature is not fully supported by Alligate due to Alligate's design constraints. See note below.**

**Explanation on the Dangers of Currently Daisy Chaining Filters in Alligate:
SNF4Alligate contains an experimental feature that can _theoretically_ be used to chain more than one filter together. Normally this feature is turned off (<delivery program='none'/>). The feature is designed to call the next filter exactly as if Alligate were to make the call.
At the moment Alligate's filter interface does not officially support chaining multiple filters. This is because Alligate is designed to expect only one external filter. A pool of threads waits to grab any messages that are available to be filtered. If a thread sees a message, it will grab it (driven by Alligate's AGFILTSVC) and hand it off to the target of the registry key: FilterExe. The number of these threads is defined by the FilterThreads value in the registry. These threads block and wait for return.
In order for the next filter in the chain to see what it expects, SNF4Alligate must first unlock the message before handing it to the next filter. The thread that called SNF4Alligate with this message is blocked but if a different thread becomes available and sees the unlocked message before the next filter can lock it then that thread may pick up the message and start putting it through the filter process all over again. It is theoretically possible (in fact likely) for collisions to occur if the # messages in the \Drop\ folder is less than the number of threads available to grab those message files.
The solution to this is to code a manager that will handle the sequential calling of the filters. Those filters would need to expect a different locking format (in order to keep message from being re-inserted into the stream) or Alligate's AGFILTSVC would need to be recoded to do collision checking on its file names.
In the mean time, BE VERY CAREFUL when experimenting with chained filters behind SNF4Alligate!
Please email support@armresearch.com with any questions.
Technical Summary
Requires Basic Sniffer Install:
In addition to installing Sniffer, the Installer will install the mail shim:Installing Mail Shim:
|